Working with Arri Alexa LogC footage in Adobe After Effects without applying LUT’s
This article proposes an easy way to work with LogC footage often generated by the Arri Alexa inside After Effects. It is important that you are familiar with LogC and rec709 colour space. You can find great information about these colour spaces here: http://www.arri.com/camera/digital_cameras/learn/log_c_and_rec_709_video.html
The most common method of matching source footage generated in different colour space is by using a LUT (Look up table). For example. Let’s say you have a shot where you need to composite an image onto a computer screen that was left black during the shoot. The source footage from the Alexa will be LogC and the image you are compositing onto the screen will either have a sRGB or rec709 colour space. Both need to be the same before you can composite. Because our TV’s at home use rec709 colour space, and our eyes recognize this as a “close-to-real-life” representation of color, we must ensure we view our footage in the same colour space before we can start compositing.
LUT’s are often used in post production to tell the software HOW to view or convert footage so that they are visually compatible. However, After Effects does not support LUT’s (except as an effect), and thus ICC colour profiles will be used. ICC profiles are the colour profiles your computer uses to ensure your screen is calibrated and ensures the printer’s colors match the screen. You can read more about ICC here: http://www.color.org/faqs.xalter We will be using a generic ICC profile since a specific LogC profile must be purchased at the time of writing.
There is one problem with converting footage: you will lose quality. There is one bigger problem with converting LogC to rec709: You will loose so much colour information that it will defeat the purpose of shooting LogC in the first place. Thus, we need to tell After Effects to non-destructively display all elements and footage in the same colour space without altering the source footage.
This is how it is done:
The first step is to set your project settings:
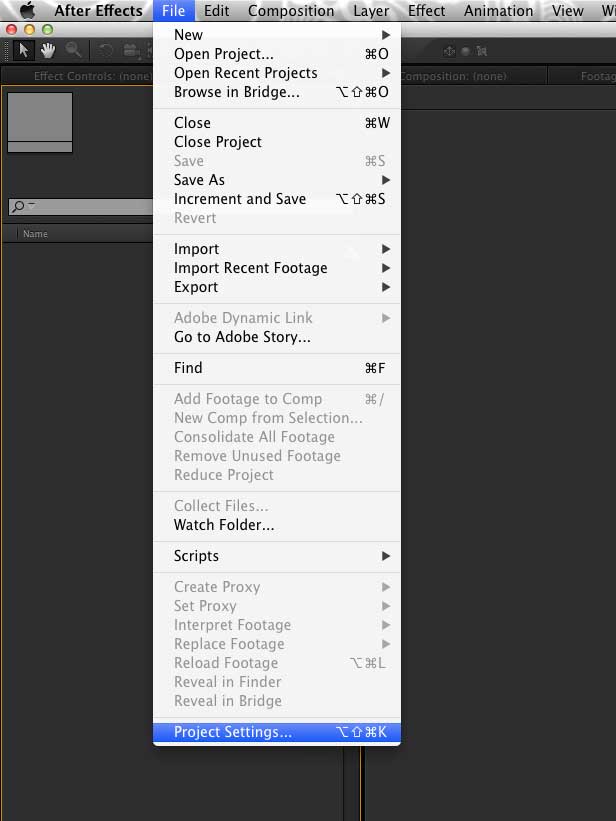
The “Color Settings” are what we are interested in. These settings define the colour management in After Effects.
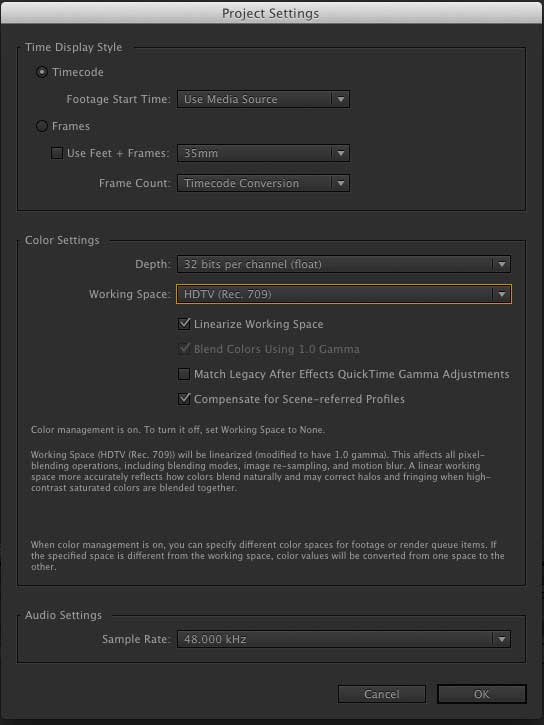
Change the color Depth to “32 bits per channel (float)”
Change the Working Space to “HDTV (Rec. 709) – We do this so that we can view all footage in Rec709 while working.
Select “linearize working space” to work in a linear colour space (This is another article in it’s own right).
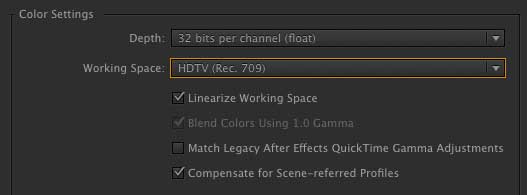
By selecting “32 bits per channel (float)” we ensure that colour information will never be “clipped” when converting the LogC footage to rec709 (Unfortunately After Effects destructively applies colour space changes, so we need the 32 bits for the LogC footage not to be clipped in Rec709 colour space). Often 16bit will look perfect to the naked eye, but once the footage has been comp’ed and exported to be colour corrected, the 16bit footage will have substantial less information available in the highlights. In my tests I’ve found the “32 bits per channel (float)” depth to retain all detail in the highlights captured by LogC footage, even while working in rec709.
Once your project is set up you are ready to import the footage you will be working with. I’ve imported some Alexa LogC footage seen below.
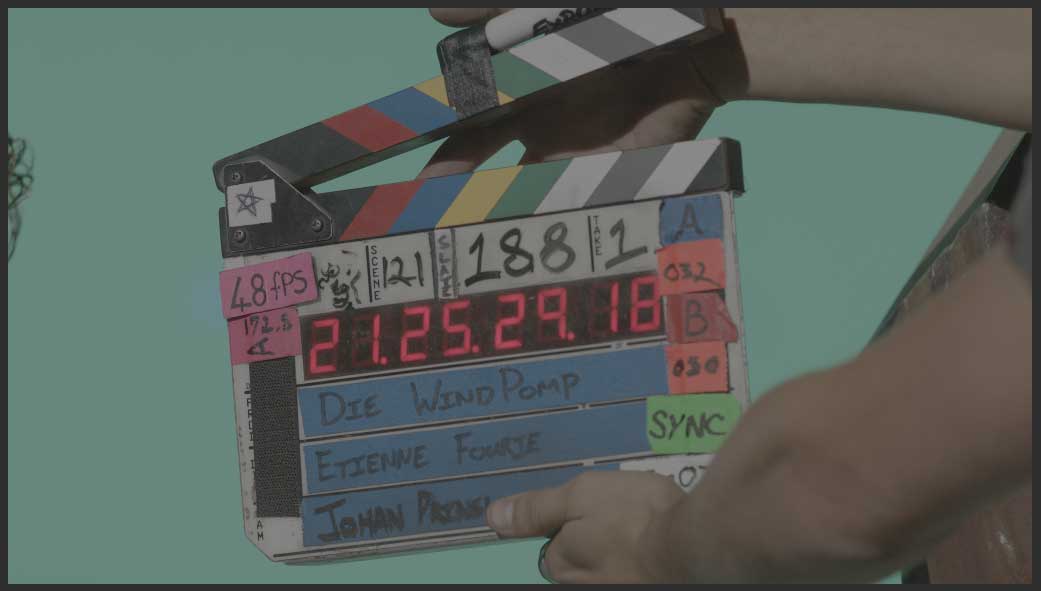
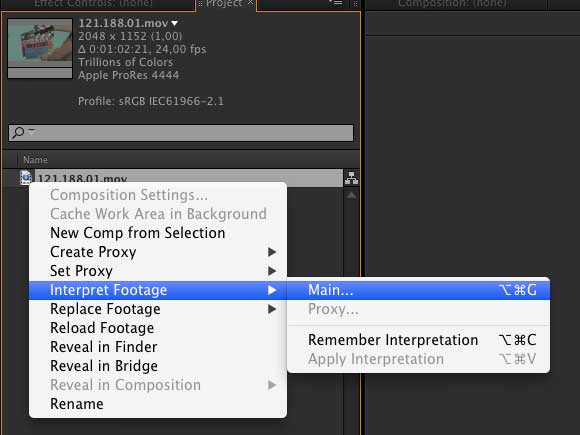
We can observe that the colours look desaturated and low contrast. This is because the footage is in LogC colour space. To “interpret” the footage correctly, we have to interpret each clip.
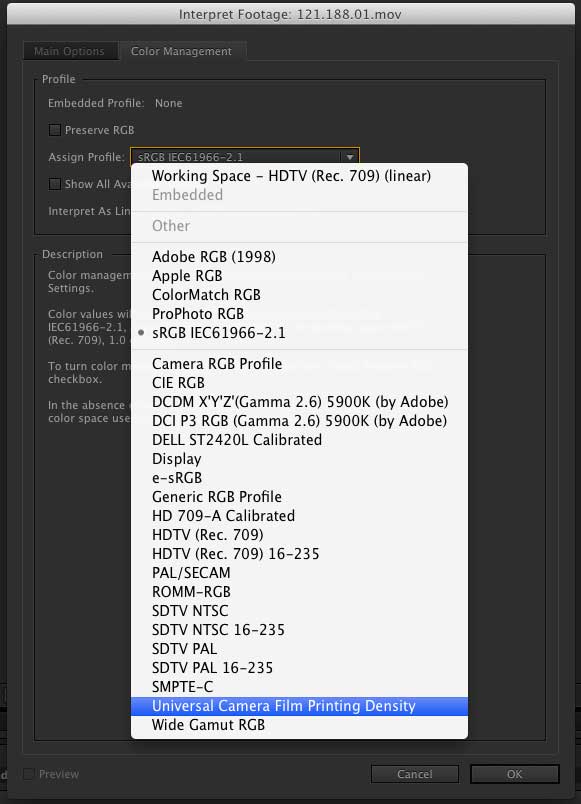
The “Color Managent” tab is where we will select the source colour space. Because After Effects does not support LUT’s you can only choose from ICC colour profiles here. Unfortunately a LogC profile is not supplied with After Effects, and thus the “Universal Camera Film Printing Density” is the closest to an Arri Alexa LogC profile available.
Your footage should now look like this:
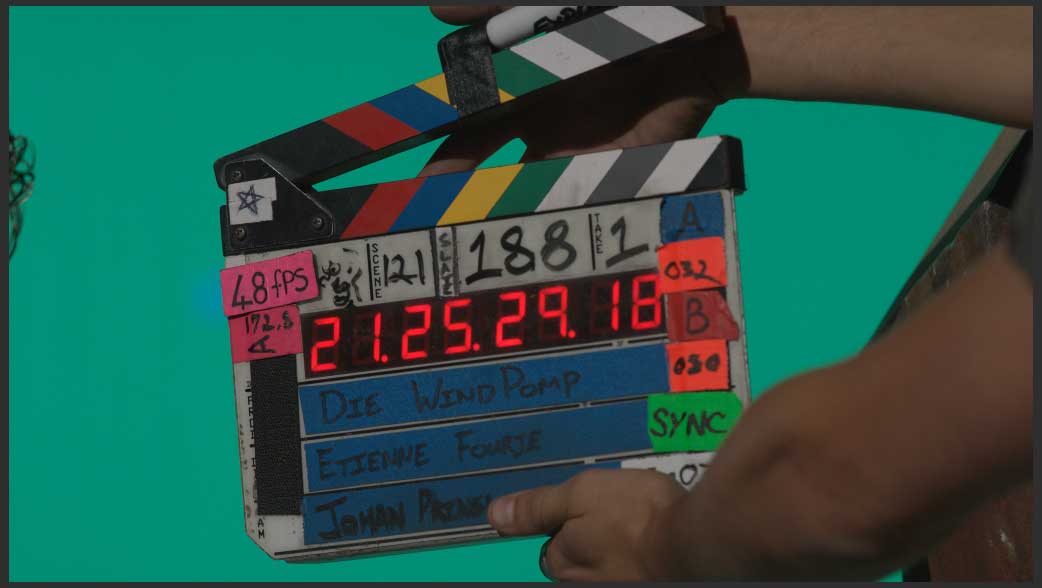
At this point your source footage has been interpreted and After Effects is displaying it in rec709 colour space. Because you’re using After Effects’s colour management you should interpret all footage before combining them in a composite.
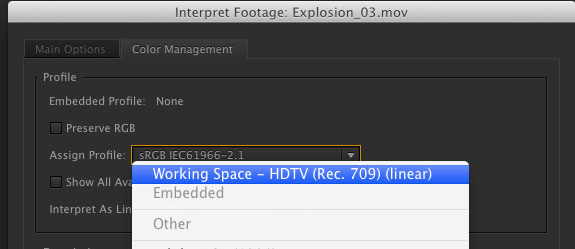
Below I’ve added some “Action Essentials” elements and a photoshop image I’ve created. The “Action Essentials” footage was most probably filmed in rec709, and thus I will set the profile to “Working Space – HDTV (rec. 709) (linear).
The Photoshop image I’m importing has an embedded colour profile which I will use. While it is very important to note that most 3D rendering engines will not render in rec709 but in sRGB, and must thus be interpreted as such. You can read more here: http://www.djx.com.au/blog/2008/09/13/linear-workflow-and-gamma/
Here I’ve made a very quick comp by combining the two images that originated in different colour spaces:

This takes us to the Output stage: The editor might well be editing with the LogC footage, but when following a professional workflow the editor will most likely be editing rec709 dailies in order to conform back to the LogC footage for Grading. Your outputs should thus match the colour space and bit depth of the footage you received. This will allow the editor to colour correct the VFX renders as if they are exactly the same as the original footage.
Let’s add a Composite to the batch render and set up the output settings: Since the Alexa shoots Prores files, we will want to render in this codec. If your source footage was Prores 422 or Prores 4444, I’d advise to set your codec to match the original. In this case, I will be rendering to Prores 4444: (If you’re on a PC, we’ll discuss a different approach a bit later)
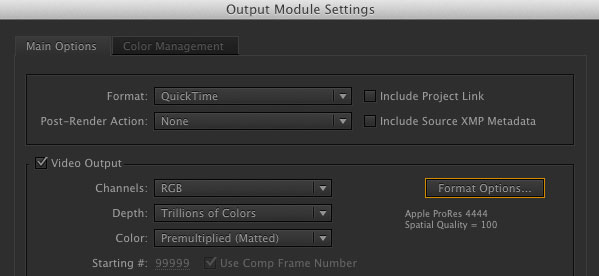
Remember to set the colour depth to “trillions of Colours” otherwise you will loose a substantial amount of colour information.
At this point we will incorrectly be rendering in rec709 color space (since this is what you are working in). We need to change this under the “Color Management” tab. Select “Universal Camera Film Printing Density” from the Output Profile.
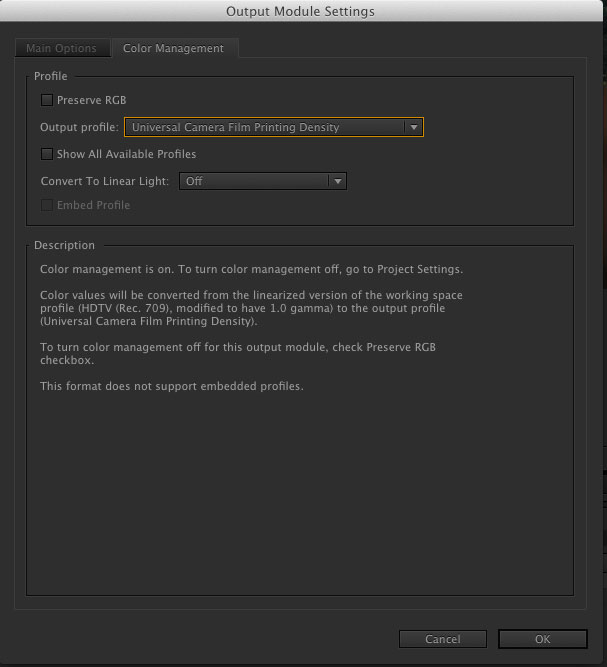
Click OK. Set your destination and hit RENDER.
From here you want to supply the file to your editor who will create a dailies version for him/her to integrate into the edit. The editor will keep this LogC render so that he/she can conform to this file when the edit is graded.
If you are rendering from a PC, I’d advice rendering a dpx sequence. The editor or you, can then import the DPX sequence straight into their grading application to generate dailies, use them to edit, and conform the dailies back to the DPX sequence when grading.
It must be noted that since the “Universal Camera Film Printing Density” ICC profile is used, the working colour space will not match a true ArriLogC-to-rec709 3D LUT. However, since the ICC profile is non-destructive, this is only a problem while working with the footage in terms of how it is displayed on your monitor. Once the files are rendered there is absolutely no colour shift between the original footage and the footage rendered through After Effects.
We can thus use ICC colour profiles to overcome Adobe After Effects’s lack of being able to work with LUT’s. Further research aims to create a ICC profile identical to an Arri LogC 3D LUT.
There are a few instances where this workflow does not work. One of these are when you shoot at a higher frame rate in LogC on the Alexa to achieve a “slow-mo” effect. The file will automatically have metadata prohibiting After Effects to interpret the file at anything other than Rec709. Martin Eriksen pointed out a easy workaround for this: Simply render the raw file out unchanged as Prores 4444, and bring it back into After effects, then follow the same workflow as above.
-Wicus Labuschagne


